As we move into the third decade of the twenty-first century, there is a clear understanding that 3D printing has gone mainstream across all areas of manufacturing. While building an assembly based on multiple machined components or on moulds or stampings will surely remain a key process across industries for many years to come, the direct 3D printing of complete components has undeniable advantages that are seeing it become more and more common in a variety of sectors.
This increase in the 3D printing of assemblies and components is being driven by the need to build more complex shapes more easily while still reducing weight, lowering costs, introducing stronger materials and producing at a faster rate. These are the forces persuading companies within automotive, aerospace, medical, consumer goods and even the food industry to quickly integrate 3D printing solutions within their business strategies.
As this innovative technology continues to gain momentum, companies are being forced to take a closer look at how they can properly control the quality of these 3D printed parts. With the widening range of 3D printers on the market, the variety of printable material types now available and the design requirements that must be maintained, how does a company control their part build?
Simply put, they use metrology solutions. There’s a wealth of metrology–grade equipment that is prepared to meet the quality control challenges of 3D printed parts. But how does a company know which is the right quality tool to use? One of the more flexible metrology solutions, and one that is quickly becoming an industry favourite, is the use of optical 3D scanning sensors. Simple quality tools are adequate for simple checks, but when you have complex geometry such as that commonly found in the world of 3D printing, an equally comprehensive dataset is required for inspection. And a 3D optical scanner such as one based on structured light scanning technology can provide exactly that.
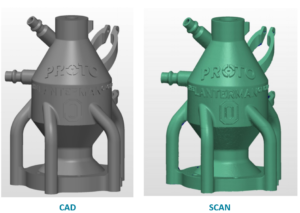
With optical 3D scanning, a highly accurate representation of the 3D printed part is acquired – its digital twin. As resolution and detail are the key components of a world–class optical 3D scanner, these high-end scanning systems are able to produce results of such high quality that the CAD and scan data can hardly be distinguished from one another. In many cases this high-quality data set allows for printing directly from the generated STL model.
Using the rich-mesh (STL) data from an structured light scanner also provides real-world feedback for 3D printing setup and build processes. Incorporating this true-to-build data for simulation and optimisation allows for a more robust and error-proof process for building the perfect part.
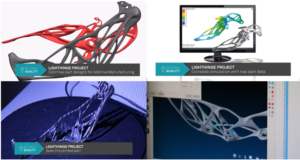
Hexagon MSC Simufact 3D printed part optimisation process | scanning solution Hexagon optical 3D scanner
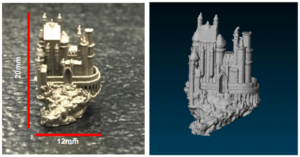
3D printed parts are highly streamlined when it comes to both design-build programming requirements and part size needs. Small intricately detailed metal parts can be directly printed at very high resolutions. This makes the ultra-high resolutions and fine accuracy performance of structured light scanners uniquely applicable to meet the challenges of inspecting complete 3D printed parts. High-end models offer accuracy to within as little as 5 microns, while full part data is collected extremely quickly, especially when used in combination with a turntable or turn-tilt table to build a semi-automated inspection system.
It’s clear that applying digitised metrology solutions is key when integrating 3D printing systems into a manufacturing business strategy, and the use of high-end optical 3D scanning systems is the current solution of choice within the 3D printing world. The above scenarios detail only a few of the reasons why it’s important to investigate the usage and potential application areas of optical 3D scanning in order to assure competitiveness in this new technological phase of industrial manufacturing.


