Process innovations and developments in metrology equipment are increasingly moving inspections out of the quality room and progressively closer to the line, reducing the time taken to collect data, obtain information, and fix issues. However, in industries where inline automation is integral to production, even near-the-line controls aren’t close enough.
The automotive industry is the original driver of automated production technology. Since the progressive assembly line was introduced in car plants, automation has been a standard, albeit developing, area for the industry. Metrology has also become an important part of automotive manufacturing, but where previously the development focus was on process control, production monitoring and robotic guidance, the concept of inline 3D metrology is now making a real impact.
360° Smart Inline Measurement Solutions (360° SIMS) is an award-winning fully automated body in white inspection system that effectively turns part of the production line into a quality room. With OEMs seeking the highest possible throughput without compromising on quality, automating more comprehensive and accurate measurements reliably in shop-floor conditions is an attractive prospect.
As an integrated solution, 360° SIMS can be installed directly into a production line, removing the logistical cost and time spent relocating parts to the quality room. Combining non-contact 3D measurement with automation technology, it uses robotic white light inspection to measure challenging automotive geometries to typical tolerances of +/- 0.5 mm.
360° SIMS brings technologies together to form a complete solution around existing production equipment. The system uses automated delivery mechanisms to bring parts to the cell, where robot-mounted white light sensors use rapid-exposure vision technology to gather highly-accurate dimensional data that can be analysed in real time, ensuring the inspection process is quick enough to take place in the line without creating a bottleneck.
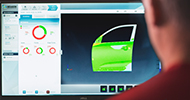
The 360° SIMS development phase led to a number of innovations, including an RPS measuring device which allows for accurate and repeatable alignment of complex parts for measurement. The closure inspection configurations continue this innovative trend, enabling parts such as doors, bonnets and boot lids to be measured automatically too.
Cells can be configured in a number of ways. For example, a full stack of parts could be brought to the cell by an autonomous device and the factory programmable logic controller (PLC) would recognise the part type to trigger the correct inspection programme. Fixed sensors can also be used to check serial numbers for a ‘smart object’ approach. The first robot would unstack the parts, either loading them onto a fixturing system or gripping them for measurement directly. The white light sensor would be mounted on a second robot and inspected according to the program identified by the PLC. Once inspection is complete, the part could be returned to the stack or sorted according to measurement results.
The 360° SIMS closure inspection cell outputs the same real-time dimensional data as the body in white system, giving clear advantages for comparing data centrally, and the two together have the potential to revolutionise flush and gap control. With such emphasis placed on closure quality in the automotive world, the system poses an exciting prospect for the body shop.


