Our range of AICON 3D optical scanners work on the fringe projection principle, sometimes known as stripe projection or pattern projection, allowing the user to quickly collect highly precise and reliable 3D scan data. Available with a flexible configuration of cameras boasting up to 16 megapixels and a wide variety of measurement field volumes from 50 millimetres to 1.5 metres, these systems can measure objects from the size of a truck key up to the size of an entire truck. Scan results are acquired at the highest resolution for the maximum level of detail, right down to the scale of the width of a human hair.
At the end of each scanning process, a ‘best-in-class’ 3D point cloud file is generated, which represents the most accurate and reliable scan data that was collected during the scanning process. Once we have our report, we need to analyse. But what’s the most efficient way to do it? Here are three benefits to analysing high-resolution scan data from AICON Scanner systems with PC-DMIS.
1. Ease of ownership
When owning a single measurement device, it can be tempting to take the easy path and go with the native software of the company that made the instrument you’re using. But what good is a software if it’s not intuitive and efficient? Fortunately, those are just two of the many benefits of PC-DMIS.
For manufacturers looking to future-proof their metrology process, adding additional measurement instruments is a great way to stay current. Wouldn’t it be nice if implementing these devices was as simple as adding an app to your mobile phone? PC-DMIS eases the handling of measurements throughout the whole company by speaking the same “inspection language” throughout the entire fleet of machines in use. PC-DMIS has all the dimensional capabilities you need to support your process, from best-in-class certified GD&T functionalities to advanced feature calculation algorithms.
With PC-DMIS, the data acquired by white light scanning instruments such as an AICON StereoScan neo can be analysed with certified calculation methodologies recognised by industry leaders. Consistent development with PC-DMIS makes the setup of a plan easy. With tools such as GD&T selection from capture, it’s easy to convert your drawing into a 3D measurement plan.
2. Ease of use
As an operator, the more complicated the analysis process is, the more of a detrimental effect it will have on your throughput and internal flows. Luckily, PC-DMIS leads the way in revolutionising measurement and focuses on delivering features that speed up your workflows, giving you greater control and increased reporting flexibility.
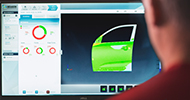
With PC-DMIS 2019, data from a white light scanner system such as one of the AICON range of 3D optical scanners can be loaded automatically, followed by the automatic starting of the analysis process. Once the metrology plan is set, the system will scan the part, generating the 3D file that will be transferred automatically for analysis. With minimal user intervention, scanning of the part – from data collection to reporting – is becoming as easy as can be. Set your template for the measurement, place the part on the turntable and press the measure button – it’s as easy as it sounds.
3. Ease of investment
When used properly and efficiently, deploying the right measurement instruments can deliver huge cost savings to your organisation. Let’s have a look how this works for an AICON Scanner operated with PC-DMIS:
a) The already mentioned ease of ownership ensures that the use of a single inspection software with different equipment lowers the need for multiple training for those working with different tools.
b) Further, exchange of knowledge between colleagues increases flexibility on inspection requests. Scanners are relatively easy to learn, but inspection needs to be carried out properly. PC-DMIS is designed to be intuitive and therefore is also easy to learn, and anything that is easy to use will also be used more frequently. This ensures your investment will be utilised and achieve a favourable return on investment in the shortest time possible.
c) With familiarity comes confidence. By implementing PC-DMIS across your metrology portfolio, there is a greater chance of the operator selecting the best tool for the job, rather than the easiest.
d) AICON Scanners such as the AICON SmartScan capture millions of points within seconds. The benefit of these high-density point clouds is in having the entire part available in 3D. Any measurement needed can be done intuitively with PC-DMIS, and if some specific details are needed later, the full surface scan is still there – just perform the analysis of additional features.
e) Best of all, if you’ve already made the wise decision to invest in PC-DMIS and the necessary training, you’re already half way to having a complete scanning solution.
Whether you’re an existing PC-DMIS user that would like to expand usage for other devices or a new user that is looking to integrate scanning with the most powerful dimensional software, PC-DMIS and white light scanner systems like the AICON PrimeScan are an ideal complementary combination that can boost your effectiveness and productivity.


