When it comes to measurement technology, it can be very easy to get caught up in the race to deliver ever finer degrees of accuracy. And while it’s true that increased accuracy is in many cases useful, focusing on this single aspect of a metrology system isn’t always the most productive way to face the challenges of a measurement application.

This is a perspective that has been increasingly occupying us here at Hexagon Manufacturing Intelligence, and the idea of delivering appropriate accuracy instead of maximum accuracy has guided product development decisions in a number of areas in recent years.
We’re not giving up on the importance of accuracy, as you can tell by the fact that Hexagon products continue to be among the market leaders in terms of accuracy. We’re just making sure we pay enough attention to the other elements that are such a vital part of turning high-end technology into better tools.
A clear example of this approach can be found within our range of handheld 3D laser scanners.
The Leica Absolute Scanner LAS-XL: Laser Scanning on a Whole New Scale
The Leica Absolute Scanner LAS has been a part of our product line up since 2016. Over the past few years it has impressed customers around the world with the measurement speed and versatility delivered by its ‘flying dot’ scanning technology, and its accuracy, which clocks in at within 50 microns under typical conditions.

Such feedback has surfaced in parallel with an increasing appetite from users to transport metrology-grade analysis into entirely new measurement arenas. This might include measurement of extremely large surfaces like those found on wind power blades or aerospace fuselage sections, or parts in areas that are hard to reach with existing tools. And it is typically in applications where micron-level accuracy isn’t vital.
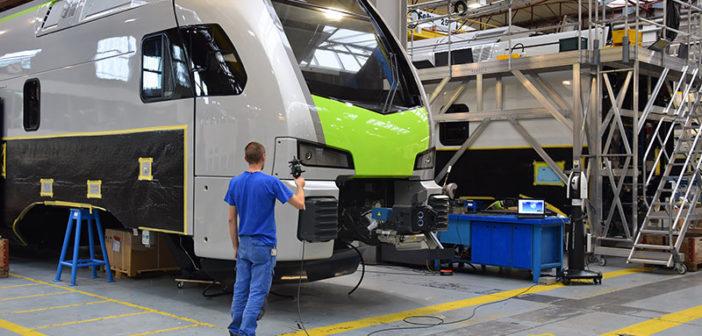
And so was born the idea to develop the Leica Absolute Scanner LAS-XL. Based on the same ‘flying dot’ technology as the LAS, the innovation behind the LAS-XL was the refining of the technology to increase the area being scanned with every pass of the scanner. Our engineers were able to produce a system that can operate with a working measurement distance – the distance between the laser scanner and measurement object – of up to 1000 millimetres, up from the just 300 millimetres offered by the LAS. This has the corresponding effect of increasing the maximum width of the system’s laser scan line from 220 to 600 millimetres.

Of course, such sea change improvements don’t come for free, and the trade-off at the centre of the LAS-XL proposition brings us back to the accuracy arms race: while the LAS offers accuracy to within 50 microns, with the LAS-XL accuracy is to within 150 microns. That’s obviously a key trade-off, and it’s one which is worth it for some users but not for others.
So what does this mean for accuracy in the world of metrology? The answer is nothing; high-accuracy measurement tools aren’t going anywhere. In fact, many of the customers who invested in an LAS-XL over the last year chose to invest in an LAS at the same time – a pair of complementary products that can cover the needs of a wide range of applications without compromising on speed or accuracy.
But the LAS-XL does show that there is room for a little something in the production spaces that the metrology world hasn’t been paying enough attention to – something that’s not as accurate as possible, but as accurate as needed.
To find out more, visit the Leica Absolute Scanner LAS-XL webpage.


