The ambition to make 3D modelling easy is at the heart of Geomagic Freeform. What makes the 2025 release unique are the new tools developed for the needs of the orthotic and prosthetic (O&P) industry.
From generating surface lattices and perforations for liners to encrypting and licensing tasks automated with Dynabot, the new functionalities in Geomagic Freeform will boost your efficiency at various steps of the design process. Learn about these features and other enhancements in this blog.
Let’s dive in!
Introducing the Perforation tool
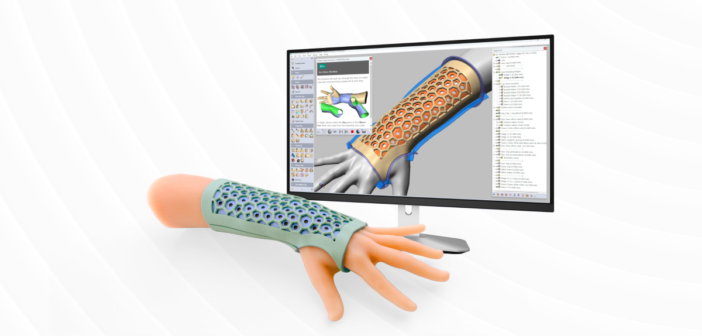
One of the most helpful new capabilities for prosthetics is the Perforate tool which allows you to add patterned holes to your design or to create shelled geometry with holes. You can distribute holes across the surface of a model, control their shape, size, and separation to find the optimal design.
Learn how to apply Perforate to a prosthetic liner to create and tweak ventilation holes in the video below.
Elevating Dynabot
We’re living in the age of automation. If you’re doing something repetitive, you should be thinking how to automate. This goes for design tasks too.
Dynabot is a functionality in Freeform that enables you to automate repetitive design tasks and use the script in any workflow you want. These scripts eliminate the minutes you normally spend on manually processing and preparing designs.
Starting with the 2025.0.0 version of Freeform, you can license and encrypt your Dynabots. Encryption ensures that the Dynabot script cannot be edited or reverse engineered by other users. With your Dynabot protected, you can license it so that it can be executed only on a specific system and sell it.
Watch these and other new enhancements in action in this video.
Surface lattice
Lattices have taken the product design world by storm. In response to their growing popularity and to requests from our users, the development team has made it possible to generate Voronoi patterns directly in Geomagic Freeform.
The new “Surface Lattice” tool allows you to create 3D curve networks that conform to the surface of a model using a Voronoi pattern. This means you no longer have to transfer your design into a separate piece of software just to apply lattices, saving you time in data transfer.
Watch the video to see how to apply a Voronoi lattice to a solid or a shelled model.
Point Improvements
The Points-based tools now have a dedicated Points palette located below the Curves palette. This includes the Annotation Points tool, which has been moved from the Analysis Tools palette, along with a shortcut for Hide/Show Annotation Points.
Additionally, a new Create Point tool has been introduced so that you can create and distribute new Points using Curves, Planes, and Pieces to guide their locations. Use the new Points for interactive snapping targets or as input for patterning Pieces.
Clay and Mesh Selection Enhancements
Working with clay and mesh has just gotten simper thanks to a number of new tools.
A Circle Select mode has been added to the Select Clay and the Select Mesh Area tools. This allows you to select a volume of clay or mesh object by drawing a circular profile and defining the depth.
Next, with a new Loop Select mode available in the Select Clay Tool you can select clay within a 3D curve loop to a specified depth. For automated workflows, you can select the curve from the Object List, and the tool will attempt to fill the area inside the curve without requiring a seed point.
You can also select polygons defined by a closed 2D profile, such as a Sketch on a Plane, thanks to a new Profile Select mode in the Select Mesh Area Tool.
See our design and selection tool enhancements in this video.
Mirror Mesh and Mirror Plane
Two new tools have been added to support mirroring mesh Pieces and Planes.
Firstly, there’s the Mirror Mesh tool, which allows you to mirror a mesh using an existing Plane or the Local/World coordinate system. This tool replaces the feature previously available through the Object List.
Secondly, there’s the Mirror Plane tool, which provides a simple interface for mirroring a Plane using an existing Plane.
3D Measurements Enhancements
The Ruler tool now includes a new Persistent Measurements toggle option. When you switch it on, you can create Distance, Thickness, Angle, and Slice measurements as objects in the Object List. They will stay visible after leaving the Ruler tool.
Another handy update is the ability to anchor Linear and Angular persistent measurements. You can connect these persistent measurements to objects so that they update when the objects are moved.
Additionally, a new Plane Select option within the Measure Slice mode allows you to select existing 2D Planes to accurately place and align a slice measurement. For interactive measurements, select 2D planes from the Object List to align the orientation of the cursor.
And in the Measurement Information dialog you’ll find the measurement value and connections for a persistent measurement. If you’re using a Dynabot, you can also retrieve the results of a measurement and use that data inside a script. Access the dialog by clicking Information from the Object List context menu for any persistent measurement.
For a quick tutorial on new tools for 3D measurement, watch this video:
Additionally, you’ll find a host of new user interface enhancements. Learn about them in this tutorial.
For a complete list of improvements and bug fixes in Geomagic Freeform 2025.0.0, read the Release Notes.


