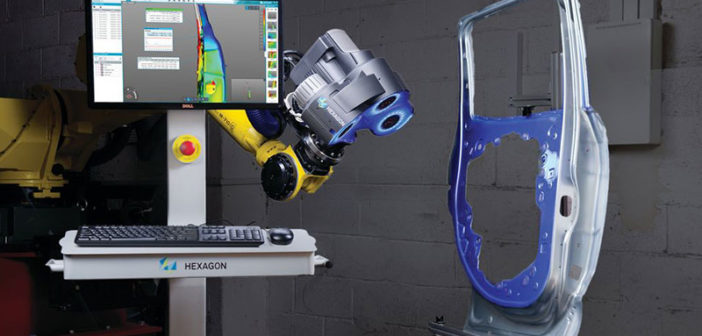
3D optical scanners, often known as white light, blue light or fringe projection scanners, provide precise point cloud data for reverse engineering processes, as well as rich dimensional information for quality control. They’re applicable to measured objects regardless of size, complexity or geometric features. As a highly versatile measurement solution, 3D optical scanners are often utilised across the development process, from design and engineering centres to high-volume production environments and quality rooms.
This comprehensive guide will assist you in your 3D optical scanner decision-making process, helping you improve design, production and metrology processes in your environment by picking the right combination of technologies for your application.
- Stay Connected to Your Development Process
Being able to acquire the right data at the right time is critical foryour business. It’s important to understand your needs and what actionable information is required for each stage in your development process.From the design phase through to a steady state of manufacturing, requirements for data may change as your development process progresses. From precise Standard Tessellation Language (STL) to real-time dimensional information, there are 3D optical scanners available in many different forms and functions that will allow you to meet your goals. - Don’t Ask, “Will It Scan?”; Ask, “Will It Scan Effectively?”
From small to large, dull to reflective, it’s important to keep these part characteristics in mind when planning your measurement strategy. Most solutions will scan any part you ask, but some may have a detrimental impact on throughput.By choosing the right 3D optical scanning technology for your application, you’ll be provided with the best-fit actionable information with the least amount of effort to acquire it. - Location, Location, Location
From pristine quality labs with fully-controlled environment conditions to harsh shop-floor situations, the location where your measurements are taking place can have a direct impact on quality of the data and your throughput.System location can be driven by the measurement need, as well as the operation flow. The ability to take measurements where needed has a direct influence on your workflow. - Performance vs. Throughput? Don’t Compromise
3D optical scanners are available in many different camera resolutions and measurement field volume options. A solution can be built out of a single measurement field volume, but a flexible solution that enables the operator to scan small and large parts is also possible, all without sacrificing productivity.And there is no need to stray from an entry-level system. A versatile, entry-level 3D optical scanner can meet your measurement requirements if set in the proper configuration and environment. - Today’s Needs vs. Future Needs
Whether you’re considering a purchase of a manual system for reverse engineering, root cause analysis and process tuning or an automated system for production sampling or inline process control, it‘s important to take your future needs into consideration.Can a manual scanner be converted into a semi-automated system, offline cell or even inline measurement solution? What off-the-shelf automated solutions exist from your solution provider and can they be expanded to support an increase in production rates? What software and statistical analysis tools can be added?These are all important questions to consider when choosing a 3D optical scanner for your organisation.
We work with manufacturers to provide them with smart solutions that enable them to become more efficient. The combination of our hardware and software solutions use data to connect departments, embed continuous learning into all stages of the production process, and place intelligent quality at the heart of the product lifecycle. Learn more by visiting our 3D Optical Measurement Systems page.


